

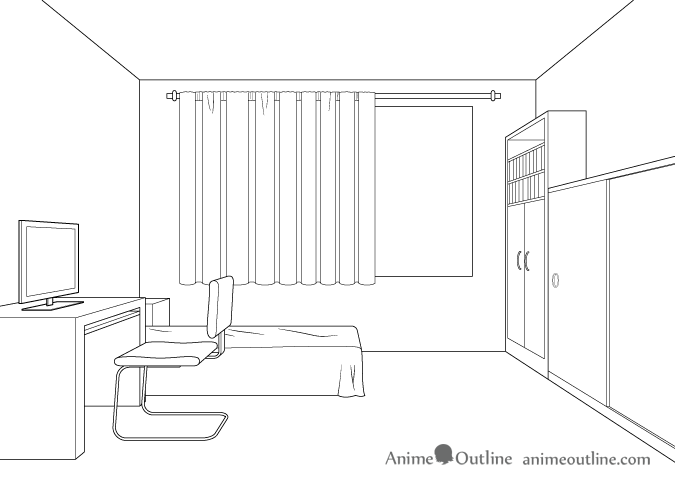
Perspective Drawing Of A Room
This step by step tutorial explains how to draw a room in one point point perspective. The example is a bedroom but the same principals can be applied to drawing other rooms with different objects and furniture.
This tutorial can be very helpful when drawing the background scenes of anime or manga but also applies to other art styles.
About One Point Perspective
One point perspective means one vanishing point. A vanishing point means the point at which objects in a drawing turn into a dot or vanish into the distance.
If you don't know about perspective drawing you should first check:
Perspective Drawing Tutorial for Beginners and How it Relates to Anime
Before You Begin Drawing
If you are going to be drawing on paper be sure to draw light lines that you can easily erase.
If you are drawing digitally you have more options but overall you will usually want to erase the guidelines/perspective lines after each step as well as the parts of the objects that will be covered by other objects.
Step 1 – Drawing the Room
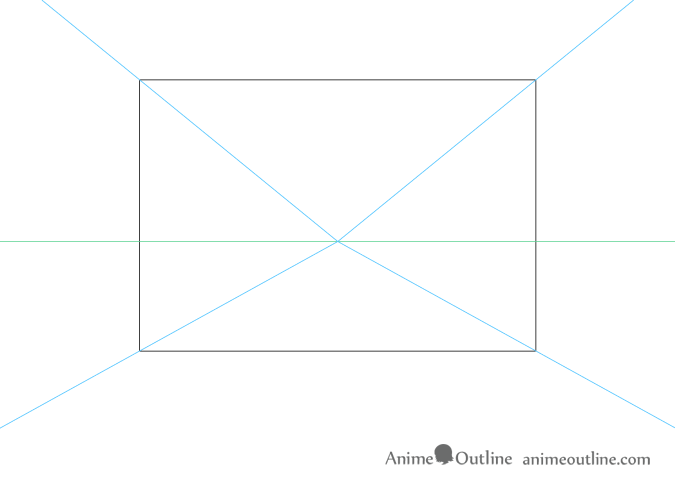
First draw a horizontal line to represent the eye level. The eye level is the level of the viewers eyes in relation to the scene (also known as the horizon line). The vanishing point will be located directly on this line and in the middle of your drawing.
Next draw the back wall (a rectangle in this case). From the vanishing point draw straight lines going through each corner of that rectangle all the way to the edges of your drawing area. Erase the perspective lines inside the wall rectangle after you are done (leave the horizon line).
You should than have the drawing of an empty room.
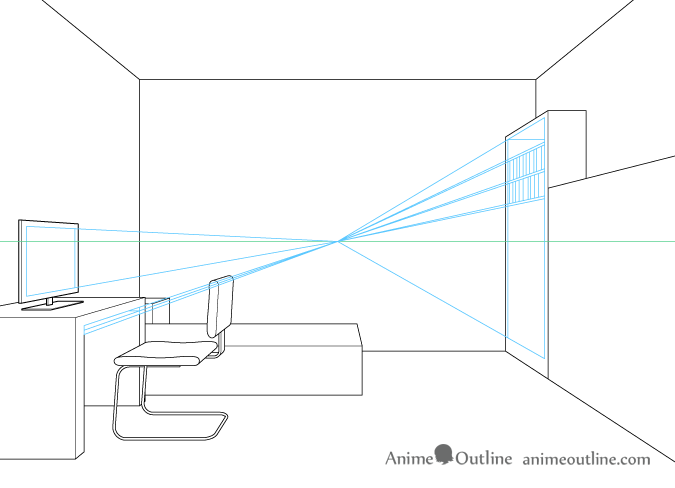
Step 2 – Drawing the Objects/Furniture in the Room

To correctly place all of the objects fully draw out the shape of each object even if it will be partially covered by other objects in the room.

Start by drawing the objects/furniture in the back of the room. To do this for these particular examples simply draw out the front side of the object and then project the perspective lines to each corner. After that the the back shape based on the perspective lines.
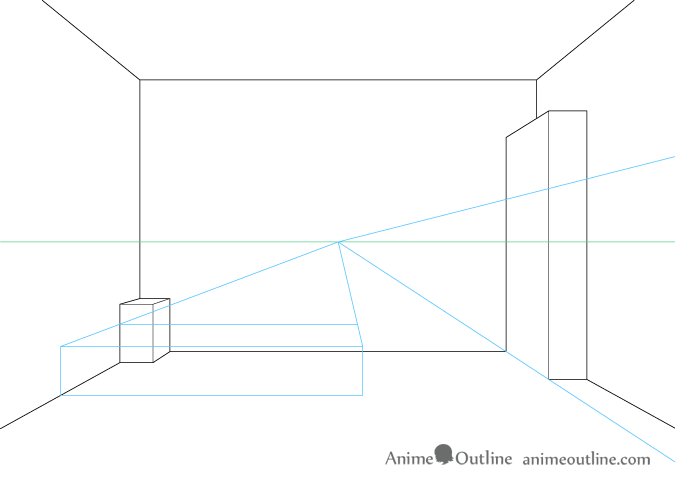
Continue drawing the overall shapes of the other furniture in the room until you place all of the major objects. Do not draw the details. You first want to correctly place all of the major shapes to avoid having to erase/delete more work than you have to in case you make a mistake.
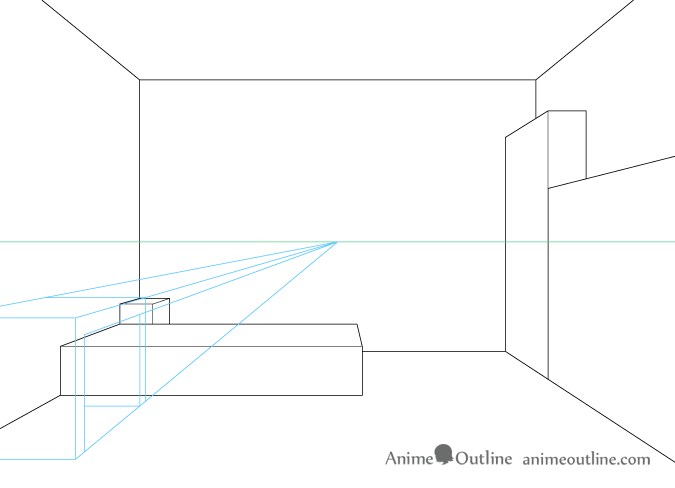
Draw the desk.
Draw the computer monitor once you have drawn all of the furniture.
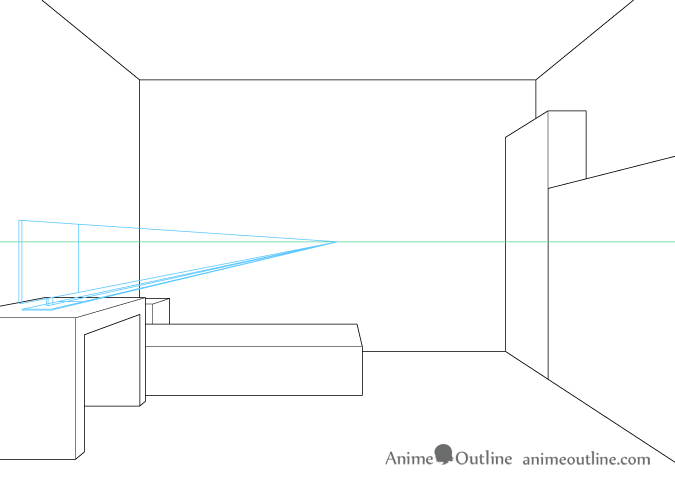
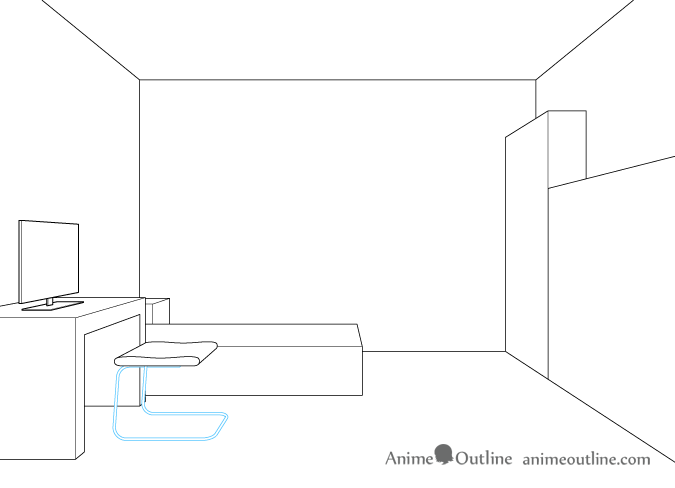
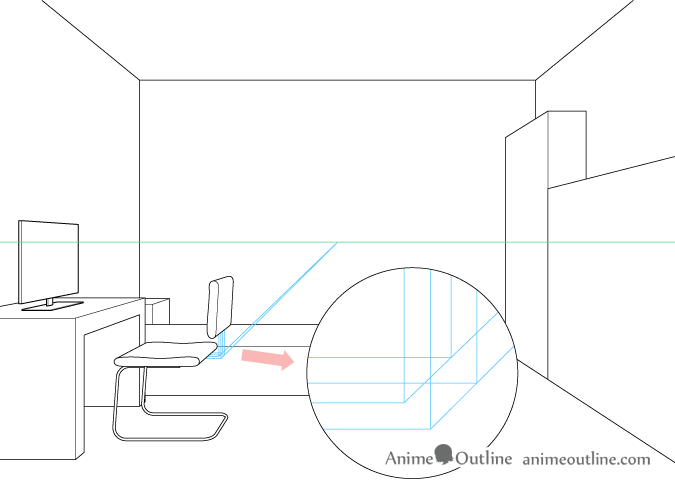
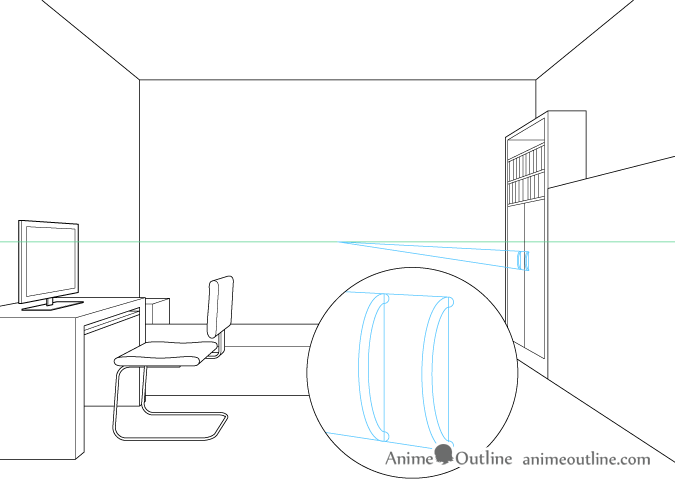
Step 3 – Drawing The Computer Chair

First draw out the shape of the front side of the chair (sort of like a silhouette). Next project perspective lines to that and draw the back side based on the front side.
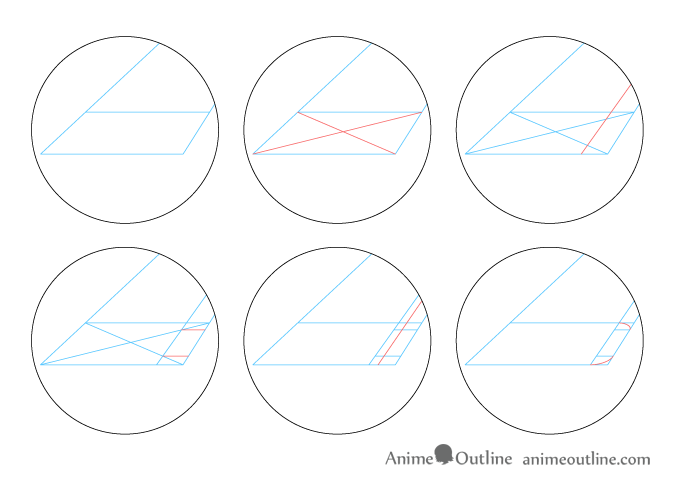
Use the above illustration to correctly place the rounded corners on the bottom/back side of the chair.
Thicken the legs part of the chair by drawing a sort of outline around the initial guideline of the legs.
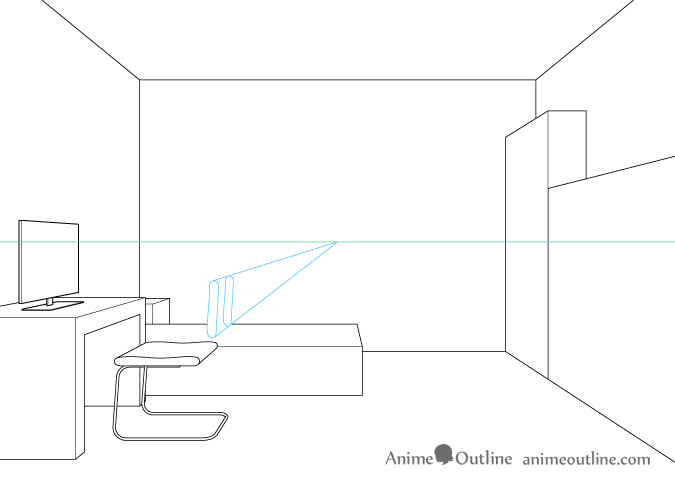
Draw the backrest by again drawing the front shape and projection perspective lines to it.
Draw the part that attaches the seat to the backrest by first drawing it with a sharp corner.
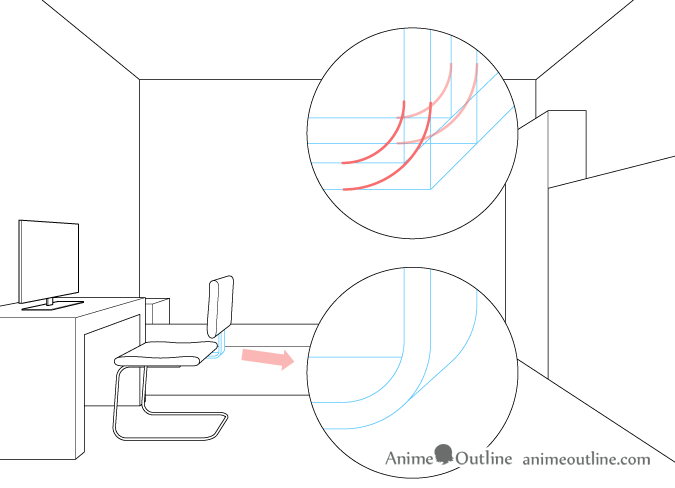
Add the rounded corners and remove the guidelines.
Step 4 – Draw the Details of The Objects in the Room
Use perspective guidelines to place the details on the furniture.
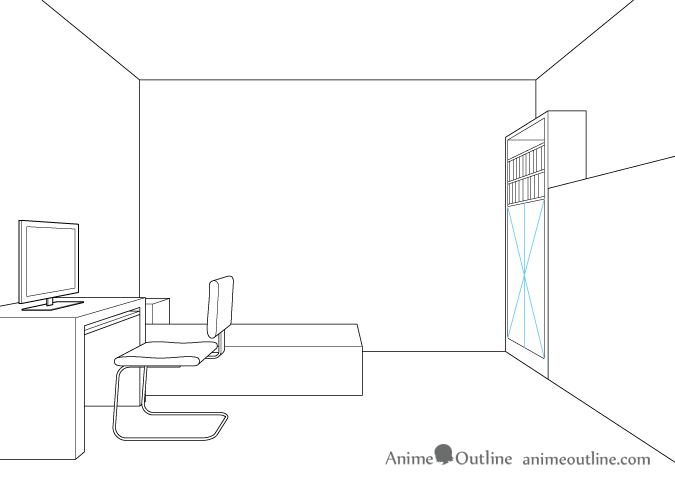
To draw the doors on the cupboard (or really to correctly place the parting line between them) draw an "x" shape on the doors going from one corner to the corner across from it. Where these intersect will be the parting line between the doors.
To place the doors on the cupboard you can first draw a small in perspective rectangle on the doors. Draw the parts where the door handles are attached on the corners of the rectangle.
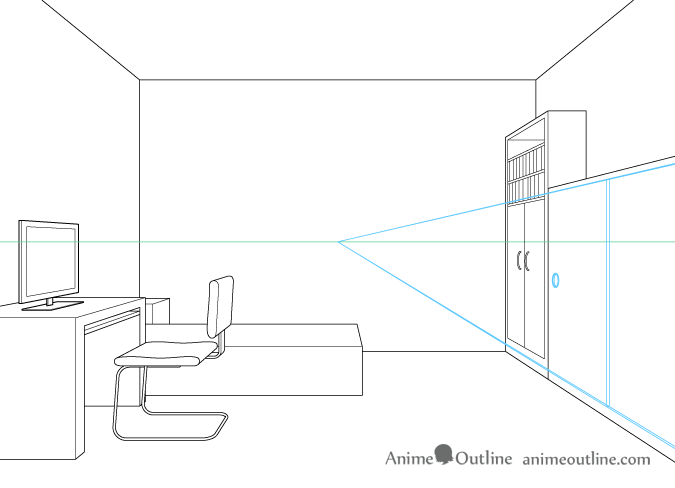
Draw the sliding doors by again using perspective lines.
Step 5 – Draw The Details of the Bed

Based on the shape of the placeholder rectangular prism (3d rectangle) draw the bed.
Round off the corners and draw some folds.
Step 6 – Drawing the Window & Curtains
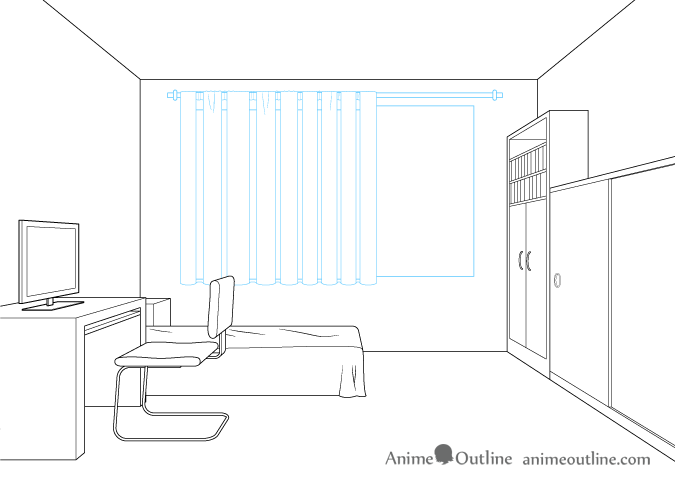
Finally draw the window and the curtains.
As the window and curtains don't really require perspective drawing in this case you can pretty much just draw them as you see them.
Conclusion
Learning perspective drawing can be quite difficult and time consuming but it's basically a must have ability if you want to become a serious artist. Drawing anime and manga is no exception. However if you do learn perspective drawing it can definitely make your drawings look at lot more impressive by giving a 2d image an appearance of depth.
For another anime related tutorial where perspective drawing can be helpful see:
How to Draw Anime Style Food & Lunchbox
Perspective Drawing Of A Room
Source: https://www.animeoutline.com/one-point-perspective-room-drawing-tutorial/
Posted by: cattplithenewark.blogspot.com
0 Response to "Perspective Drawing Of A Room"
Post a Comment